
Introduction
Deploying a Backend/Fronted app can be a daunting task, especially if you’re not familiar with the process. There are a lot of different factors to consider, such as the choice of technology stack, the hosting provider, and the deployment methodology.
There are a number of different SaaS products available that can help you deploy your backend and frontend. Some of the most popular options include:
- Heroku
- Netlify
- AWS Elastic Beanstalk
- Google App Engine
If you’re looking for a way to simplify the deployment process, then you should consider using Buildndeploy, for rest of the blog we will be using short form BnD for Buildndeploy. It is a Saas application that takes care of hosting/auto-deploying your application with the ease of just git push command so that you can focus on more important logics of your application rather then getting confused in the vast world of devops.
Lets deploy 🚀
To get started we first need an application that we can deploy if you already have one you can simply use that, assuming that you are new to all this I am going to create a new React application and deploy that to BnD.
So there are two ways to do that, since BnD require some custom configured docker files either we can use build and deploy platform to create a github repo for us or we can create one by ourself and deploy that to BnD using github. Lets Explore with BnD first.
Method 1 👾
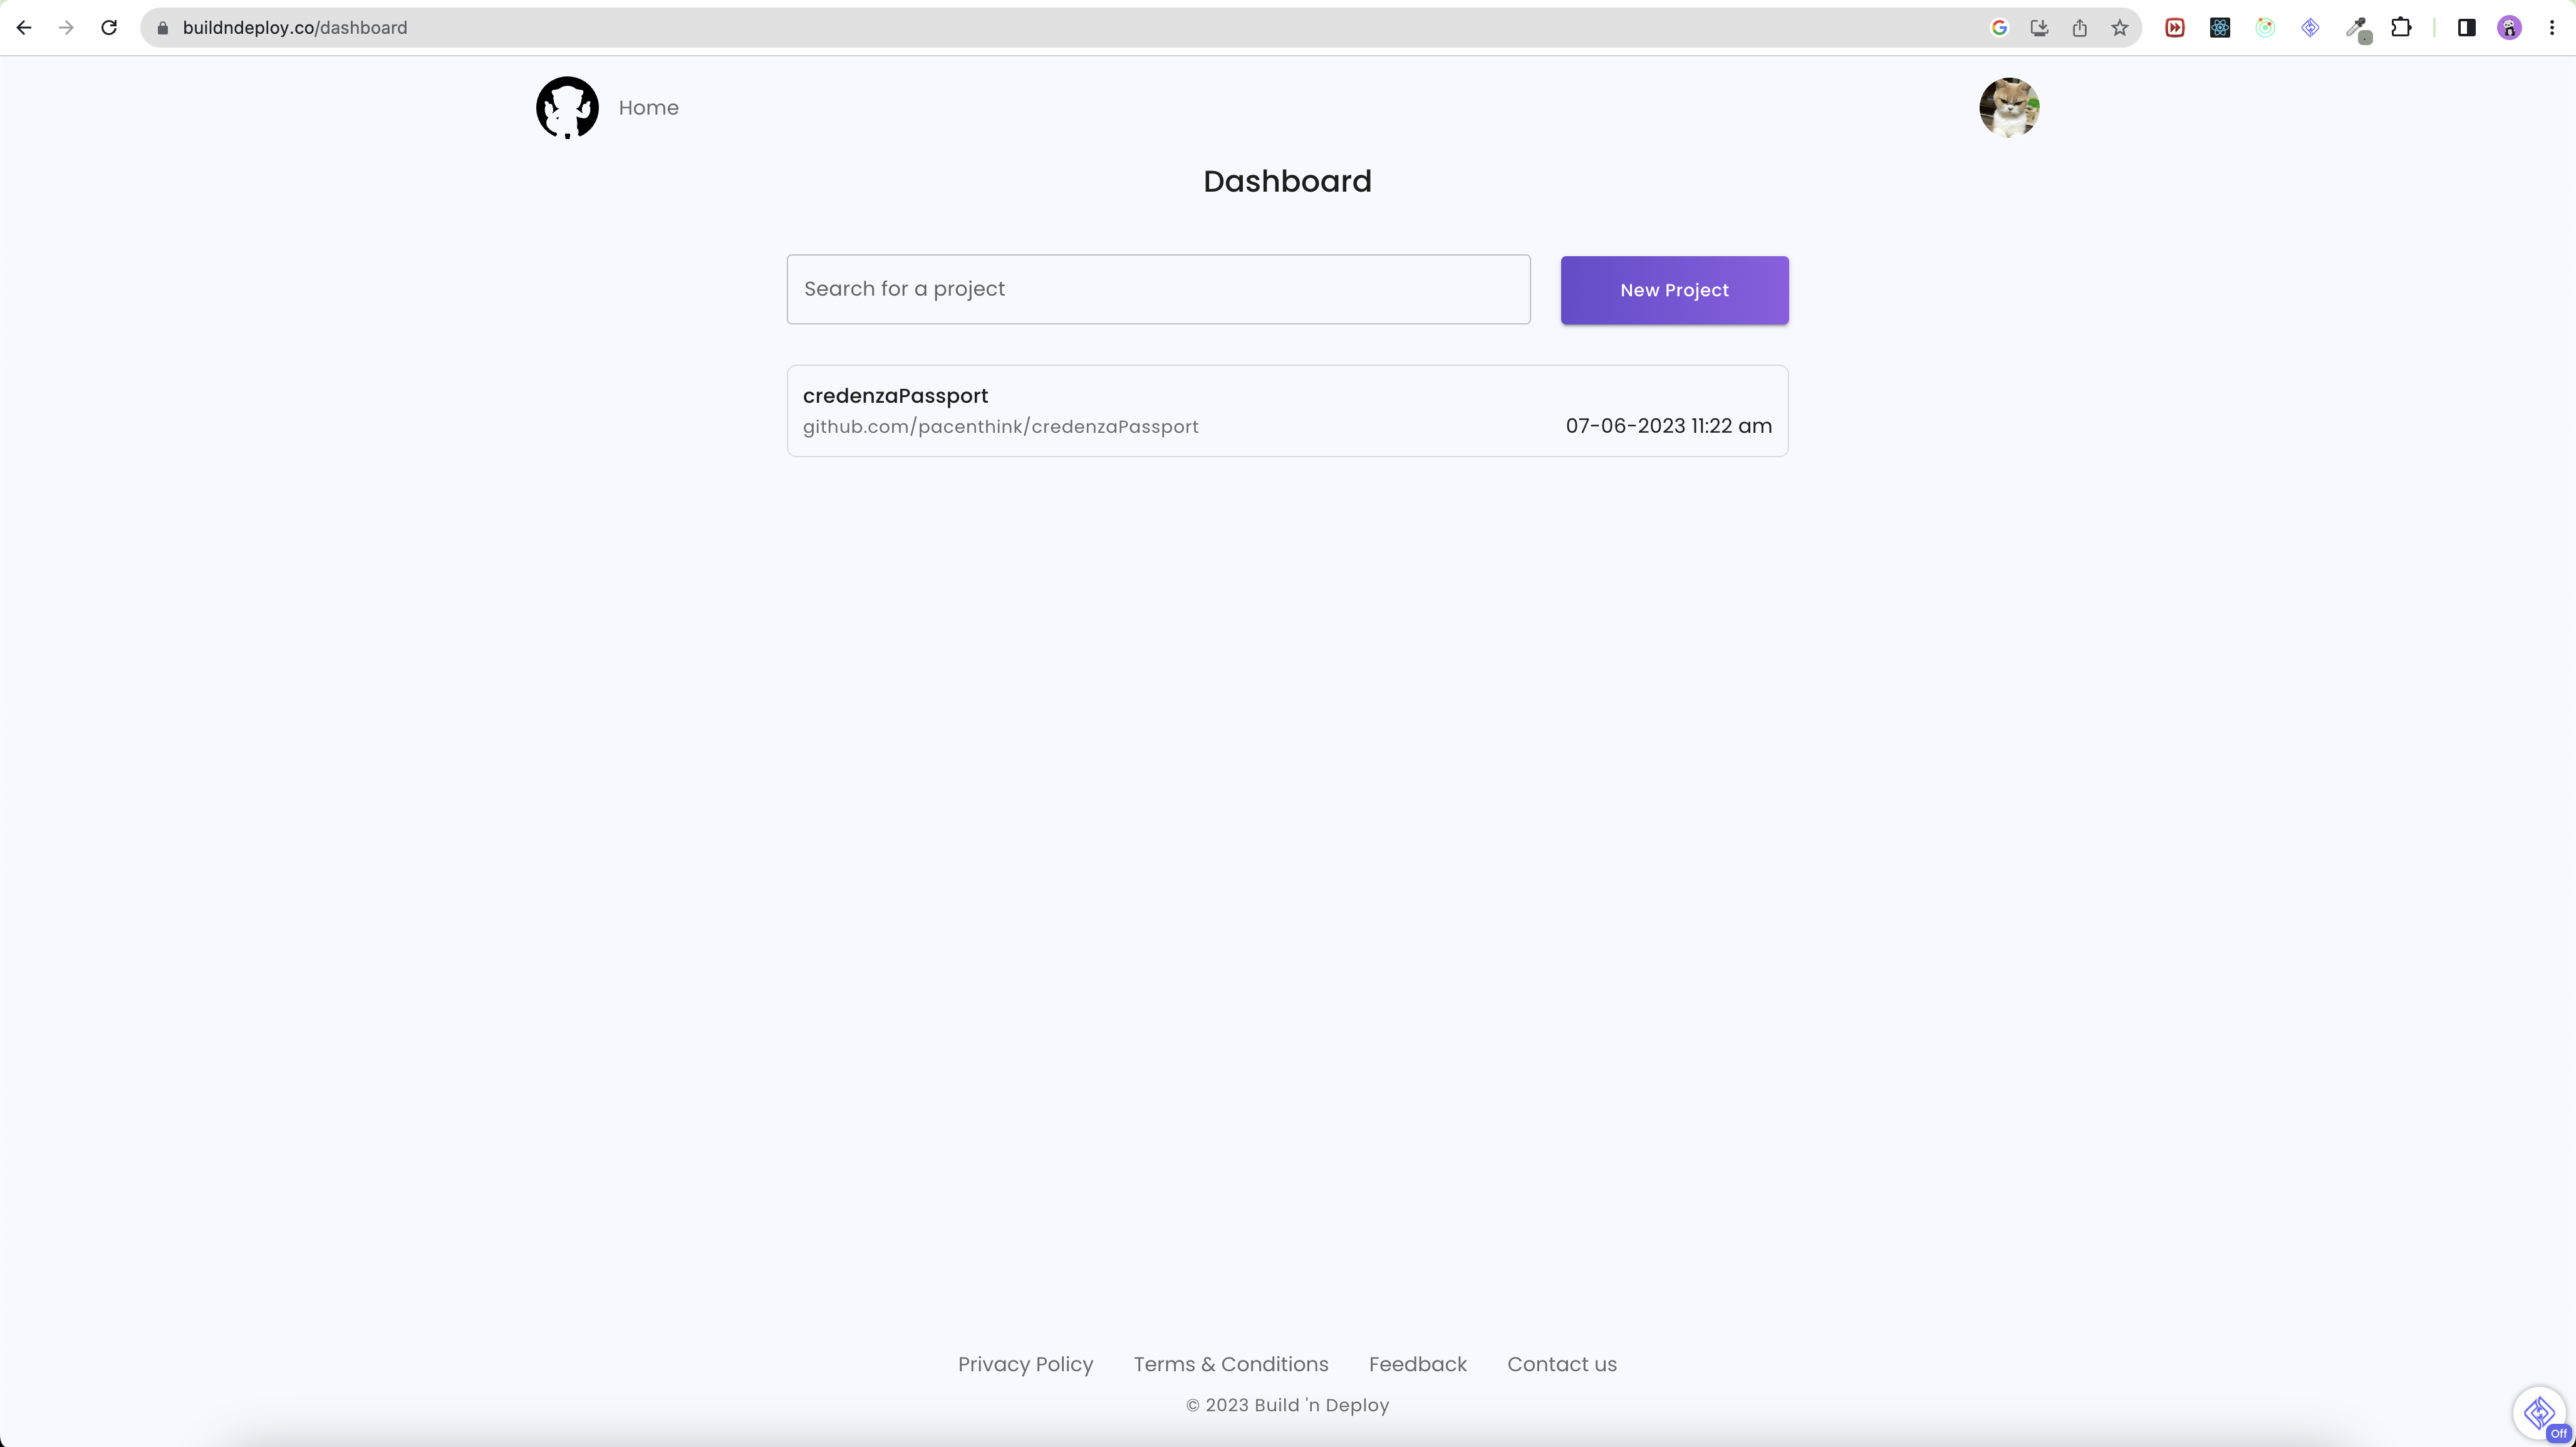
Head on to BnD and your dashboard should look something like this:
Now you have to select New Project button and select New Project option, you will be given two fields, enter the Name you would like in first field and select the framework whose boilerplate you want to generate. ( P.S. If you didn’t find the framework you are looking for you can head to Method 2 right away, since I am using Reactjs in this demo they already have support for that. )
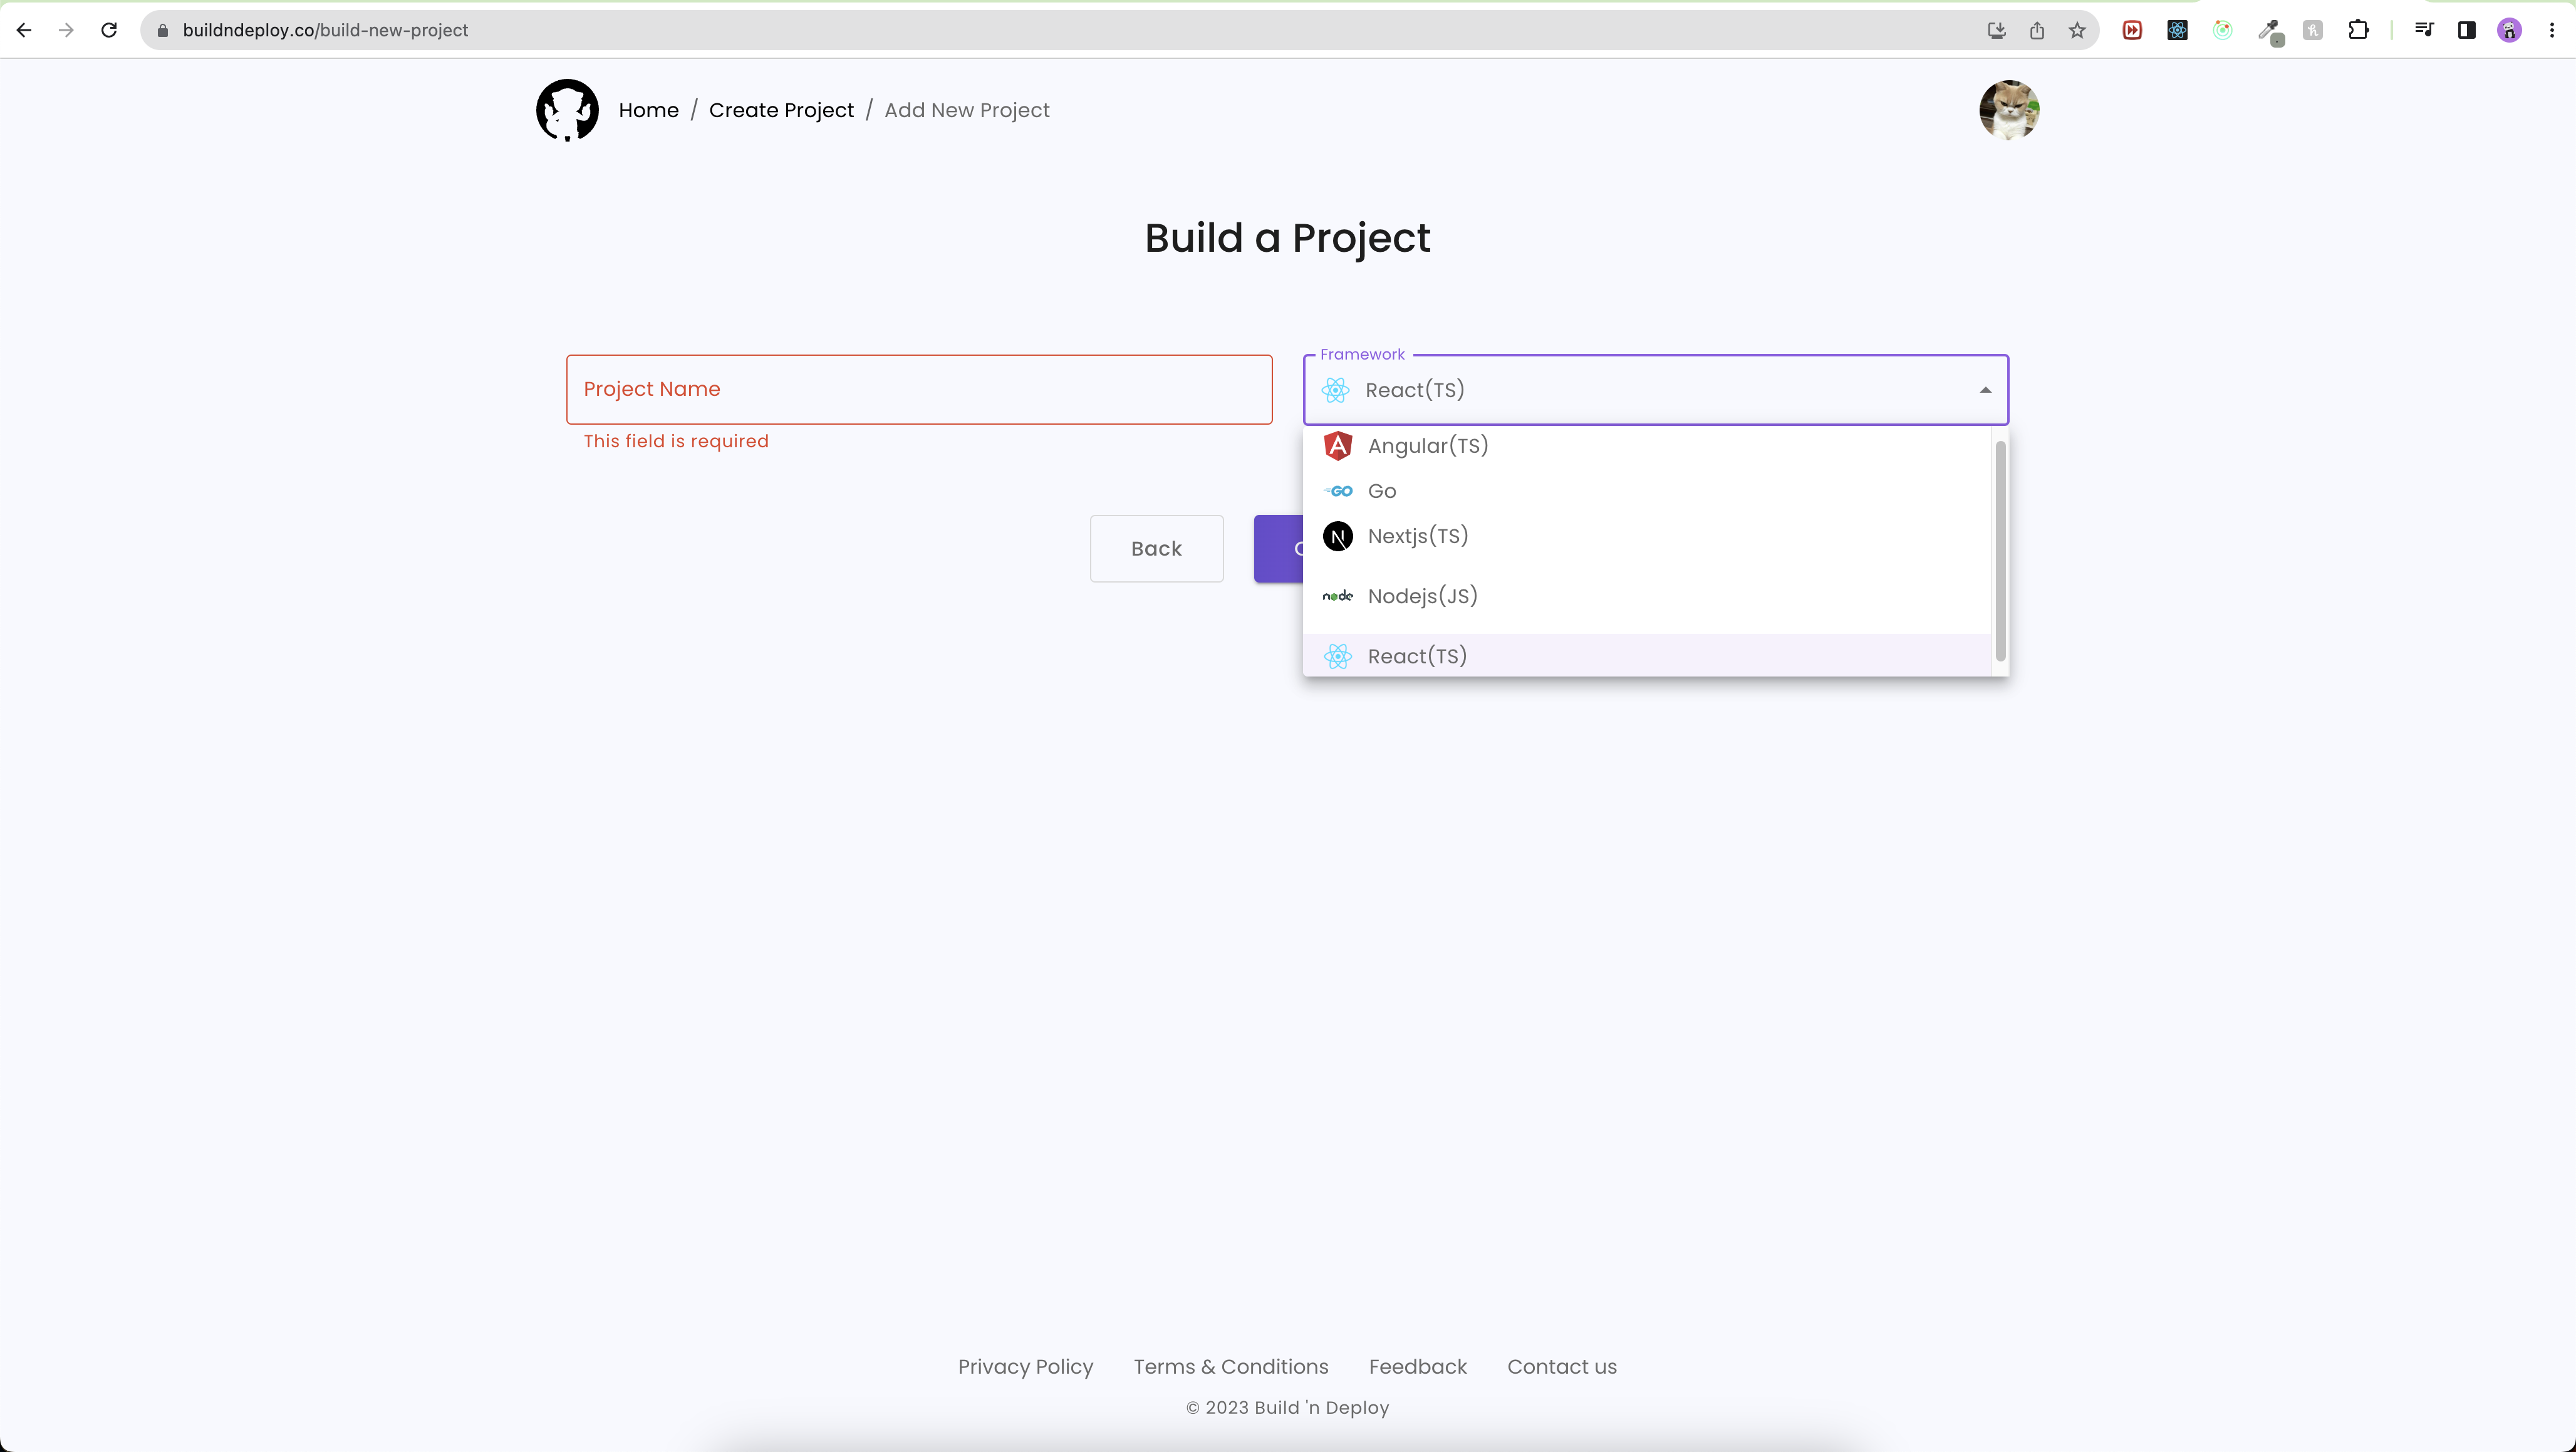
Along with Reactjs they have boilerplate support for Angular.js, Next.js, Golang and Node.js apps ( On time of writing this blog ). Don’t worry your language will be here soon

Once you have successfully completed the process you will notice that in your github you have a repository with the same name that you gave to you app, on top of that your repo gets auto deployed on BnD. Now you can clone your repo locally make some changes and push, voila !!!! just like that your code is auto deployed to the cloud.
Your project’s home page on BnD will look something like this depending on what framework you choose.
Method 2 🧑🏻💻
Head on to your teminal and create a new React application with the following command:
$ npx create-react-app my-app
after it has finished its execution you will see this message refering that a new project has been initialized with name my-app:
$ Success! Created my-app at /Users/Username/my-app
Inside that directory, you can run several commands:

  npm start
    Starts the development server.

  npm run build
    Bundles the app into static files for production.

  npm test
    Starts the test runner.

  npm run eject
    Removes this tool and copies build dependencies, configuration files
    and scripts into the app directory. If you do this, you can’t go back!

We suggest that you begin by typing:

  cd my-app
  npm start
Now the next step is you initialize a git repository in it so that you can import that into BnD and after that every time we push we get a fresh new build. Run the following command:
$ cd my-app && git init
You can do desired changes to the application and then push it to the github, we are also going to add 2 more files to our frontend and that will help the platform to deploy our project. You can copy and paste the following files directly to root directory of the project which in my case is “my-app”:
nginx.conf: This is the default file that will take care of nginx configurations of your project.
user  nginx;
worker_processes  auto;
error_log  /var/log/nginx/error.log warn;
pid        /var/run/nginx.pid;
events {
    worker_connections  1024;
}
http {
    include       /etc/nginx/mime.types;
    default_type  application/octet-stream;
    log_format  main  '$remote_addr - $remote_user [$time_local] "$request" '
    '$status $body_bytes_sent "$http_referer" '
    '"$http_user_agent" "$http_x_forwarded_for"';
    access_log  /var/log/nginx/access.log  main;
    sendfile        on;
    #tcp_nopush     on;

    keepalive_timeout  65;
    #gzip  on;
    #include /etc/nginx/conf.d/*.conf;
    server {
        listen 80;
        location / {
            root   /usr/share/nginx/html;
            index  index.html index.htm;
            try_files $uri $uri/ /index.html;
        }
    }
}
Dockerfile: this file will dockerize your application, it’s inclusion is required as BnD uses it to deploy your application.
FROM node
WORKDIR /src
COPY . ./
RUN npm install -f && npm run build

FROM nginx:stable-alpine
COPY --from=0 /src/dist /usr/share/nginx/html
COPY nginx.conf /etc/nginx/nginx.conf
EXPOSE 80
CMD ["nginx", "-g", "daemon off;"]
now we will commit and push the changes and head on to the BnD platform.
After you have Signup on the platform you will see a page like this, I already happen to have a project deployed but if you are new user yours will look empty ( just like my brain sometimes 🥲 ) :
click on New Project button and you will be presented with two options either you can “Create a New App” or you can “Use an Existing App”. Since we already had deployed our app on github we will choose Import Repository option and it will present us with a screen where we can choose which Repo to deploy :
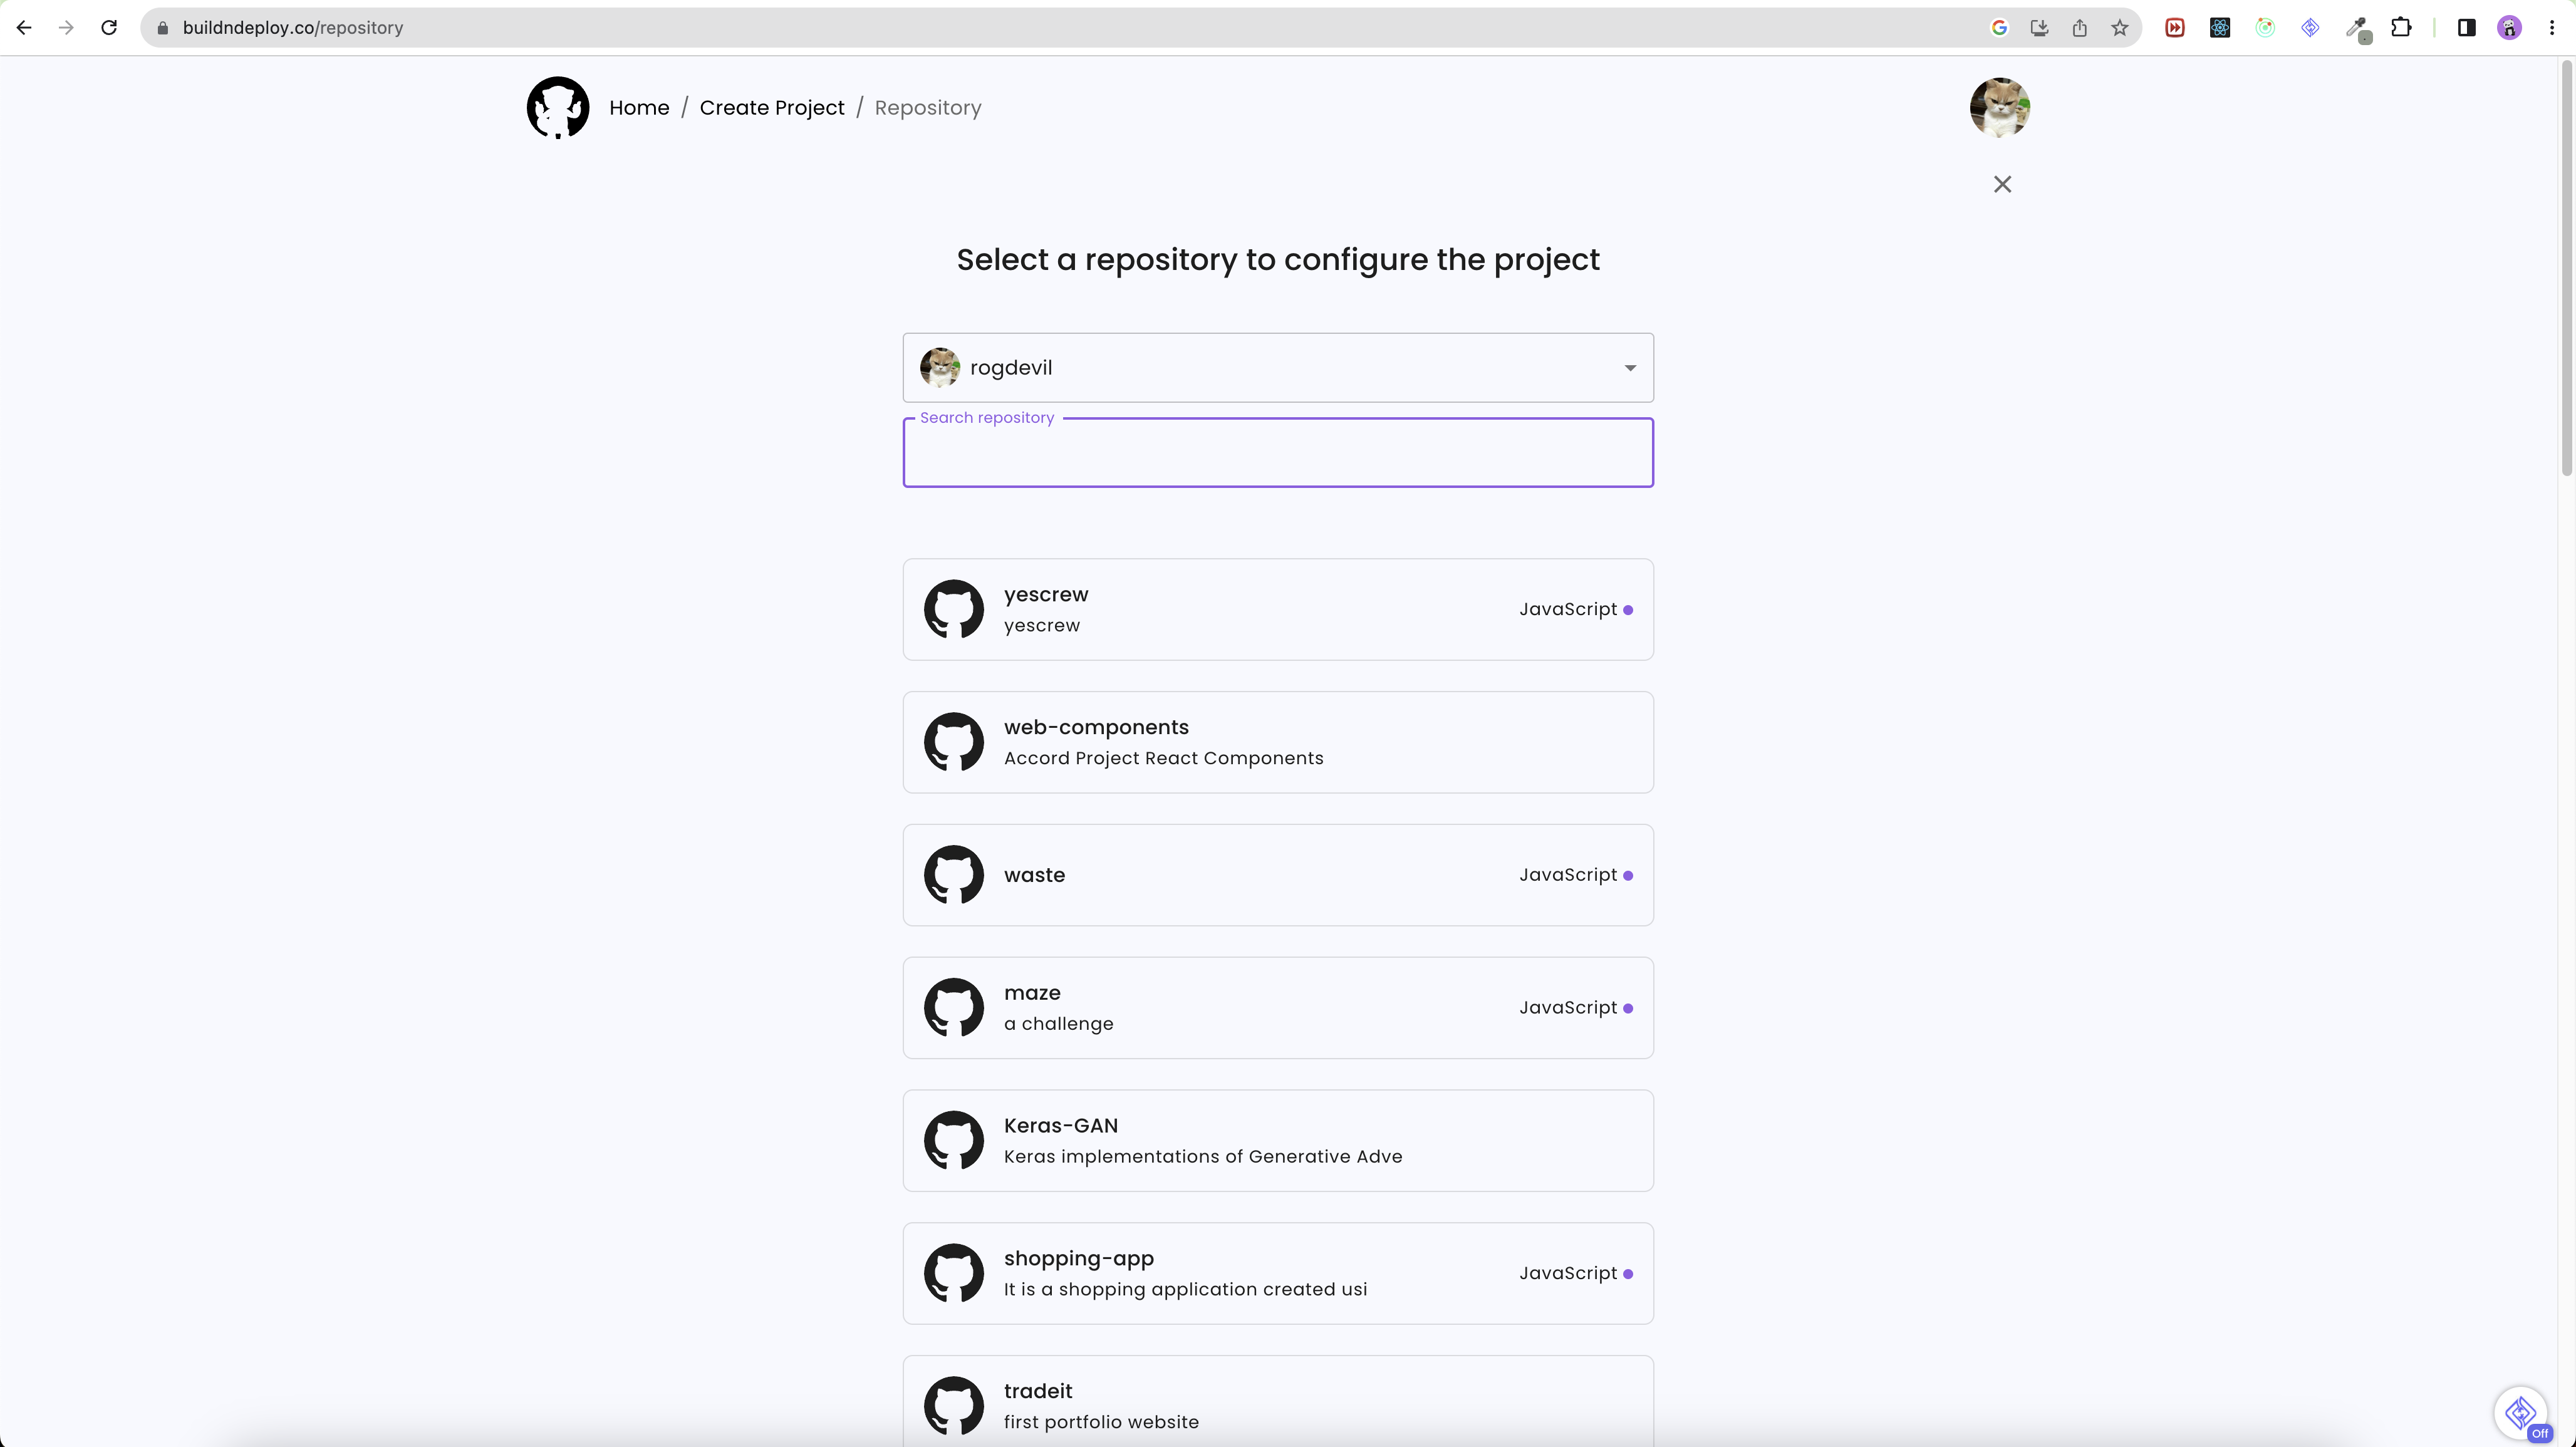
from here we will search and choose our repo that we just pushed to, and it will take us to the part to configure our application:
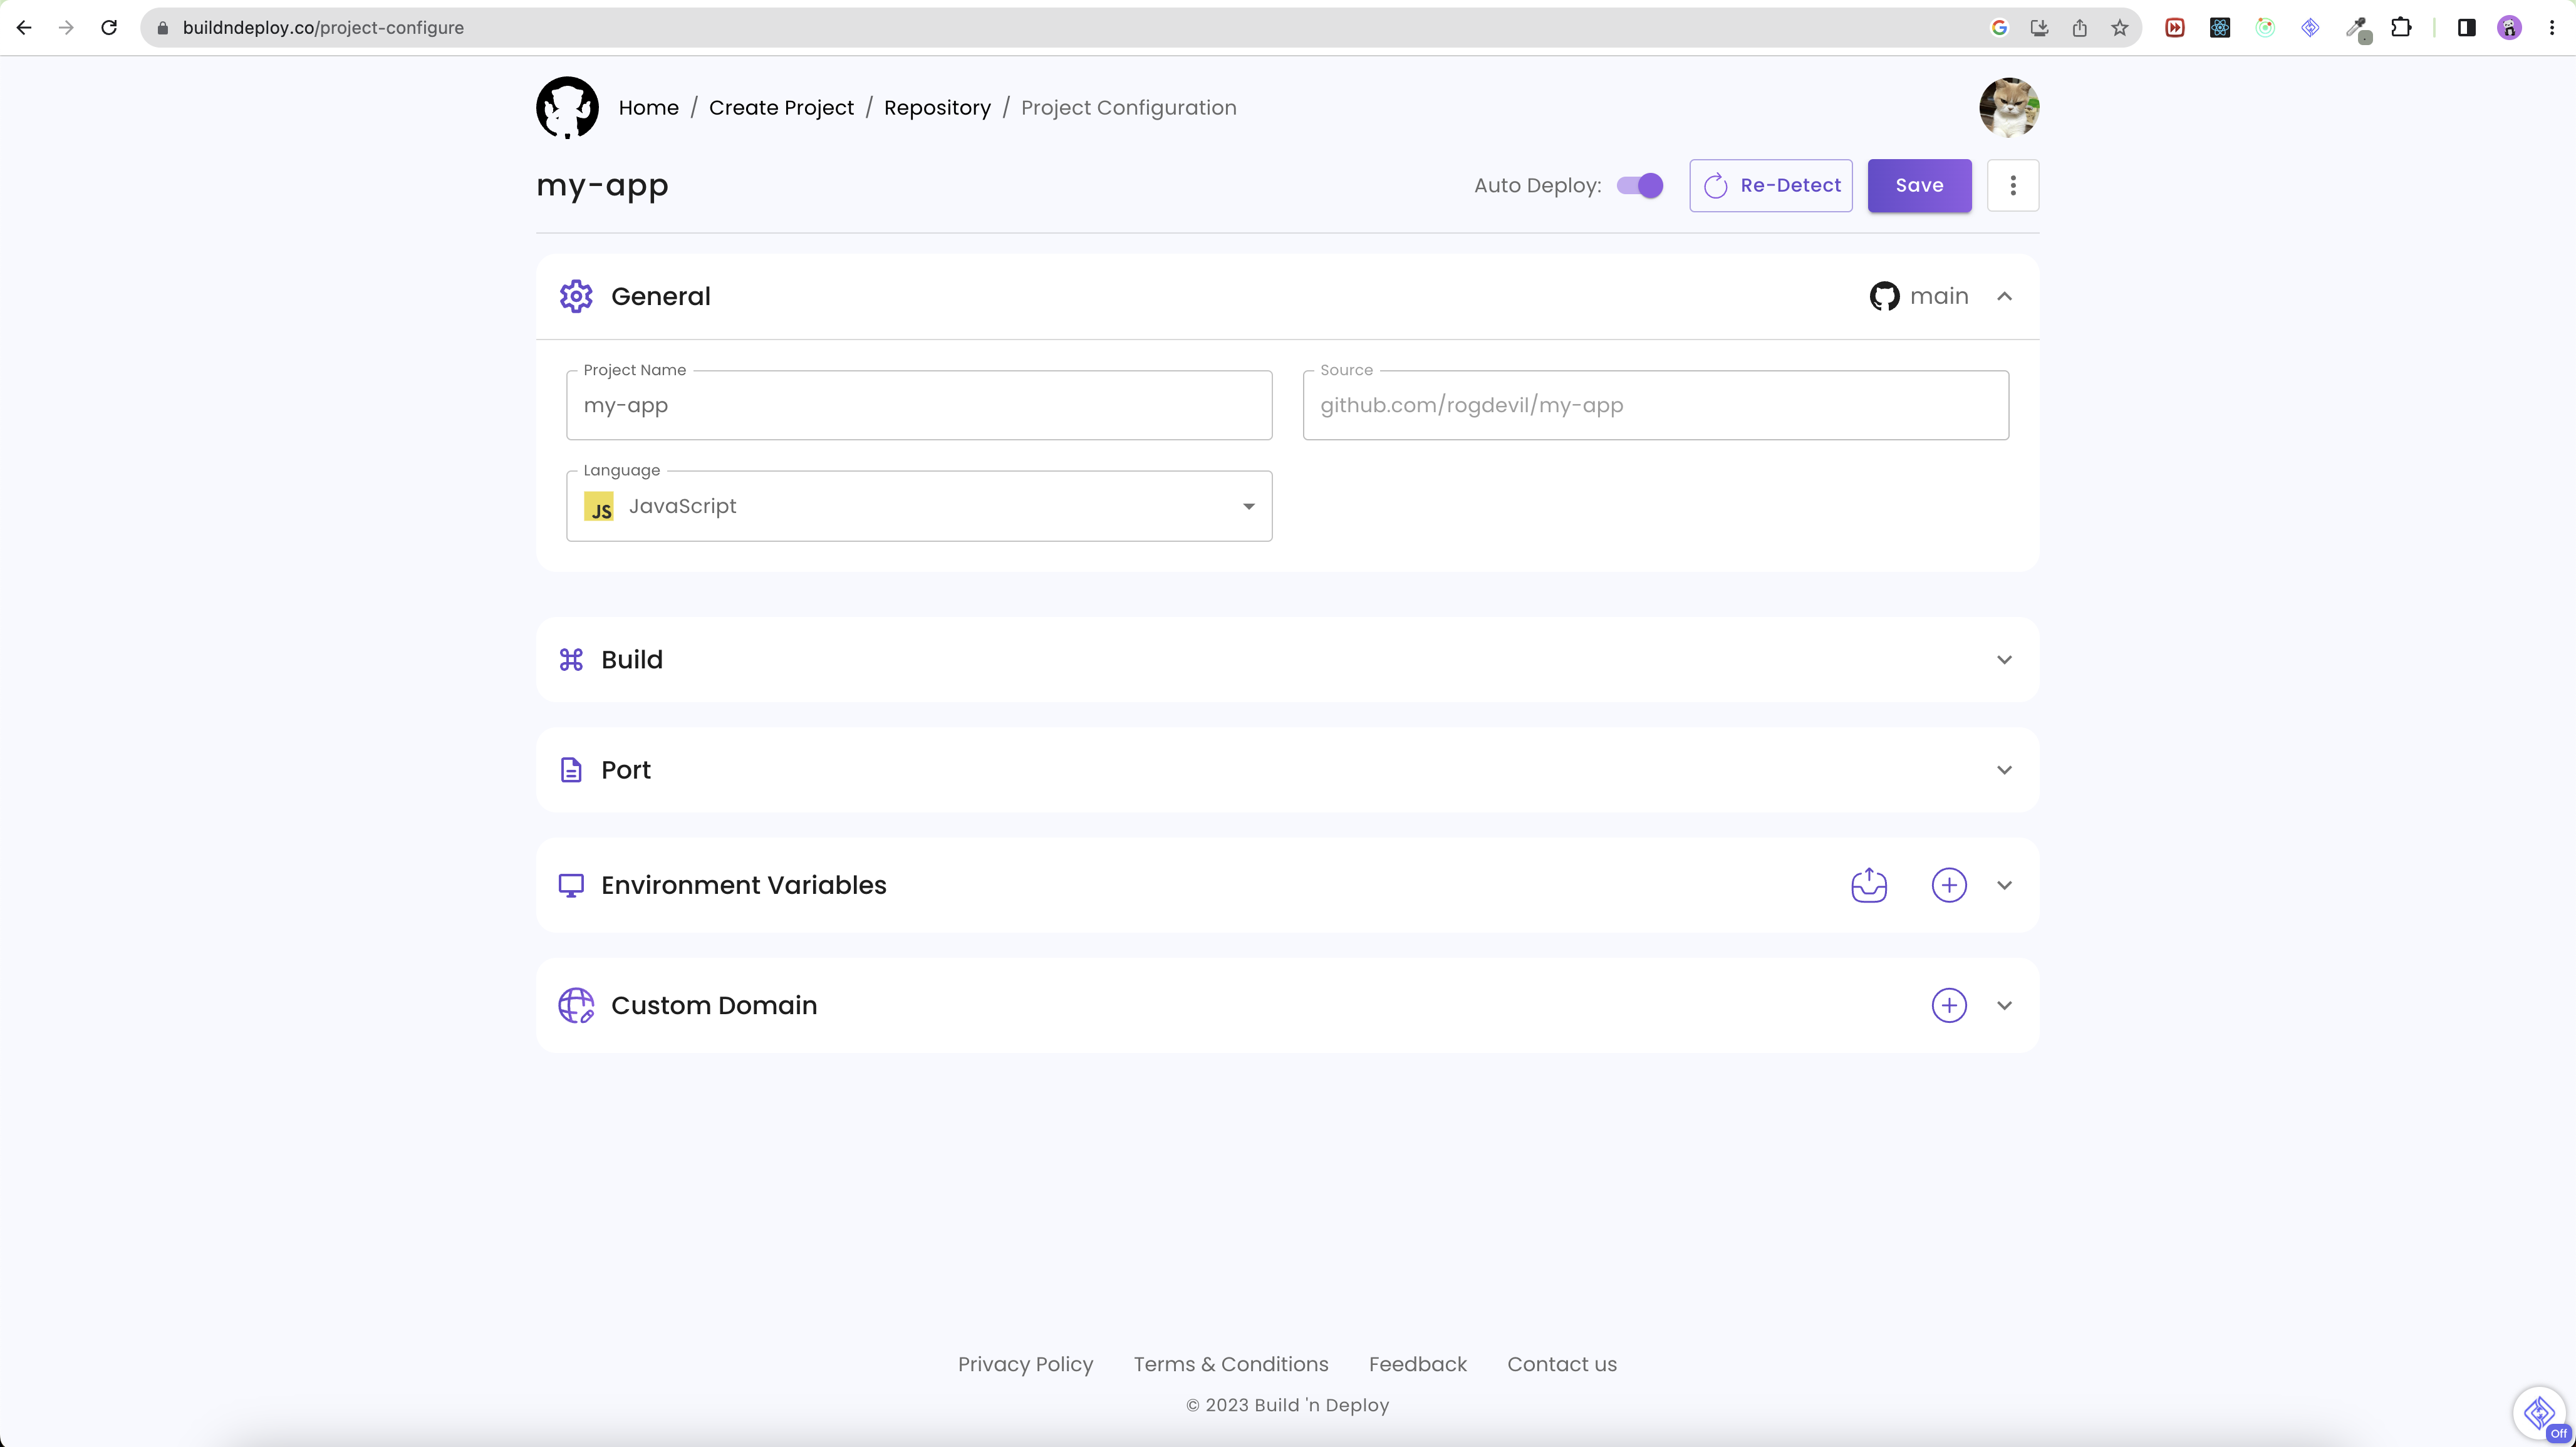
here you will have option to choose
- Set you projcet name and choose its core language ( required for build commands )
- Set your build configurations, since we already have our docker file ready we can go ahead without editing any of these options
- Set the port you want to expose your application to
- Add environment variables that you might be using in your project. we have a simple fronted UI so, we don’t need to add any of that as well
- Choose custom domain, if you own any ( We can only add one custom domain at this time, it might change in the future ).
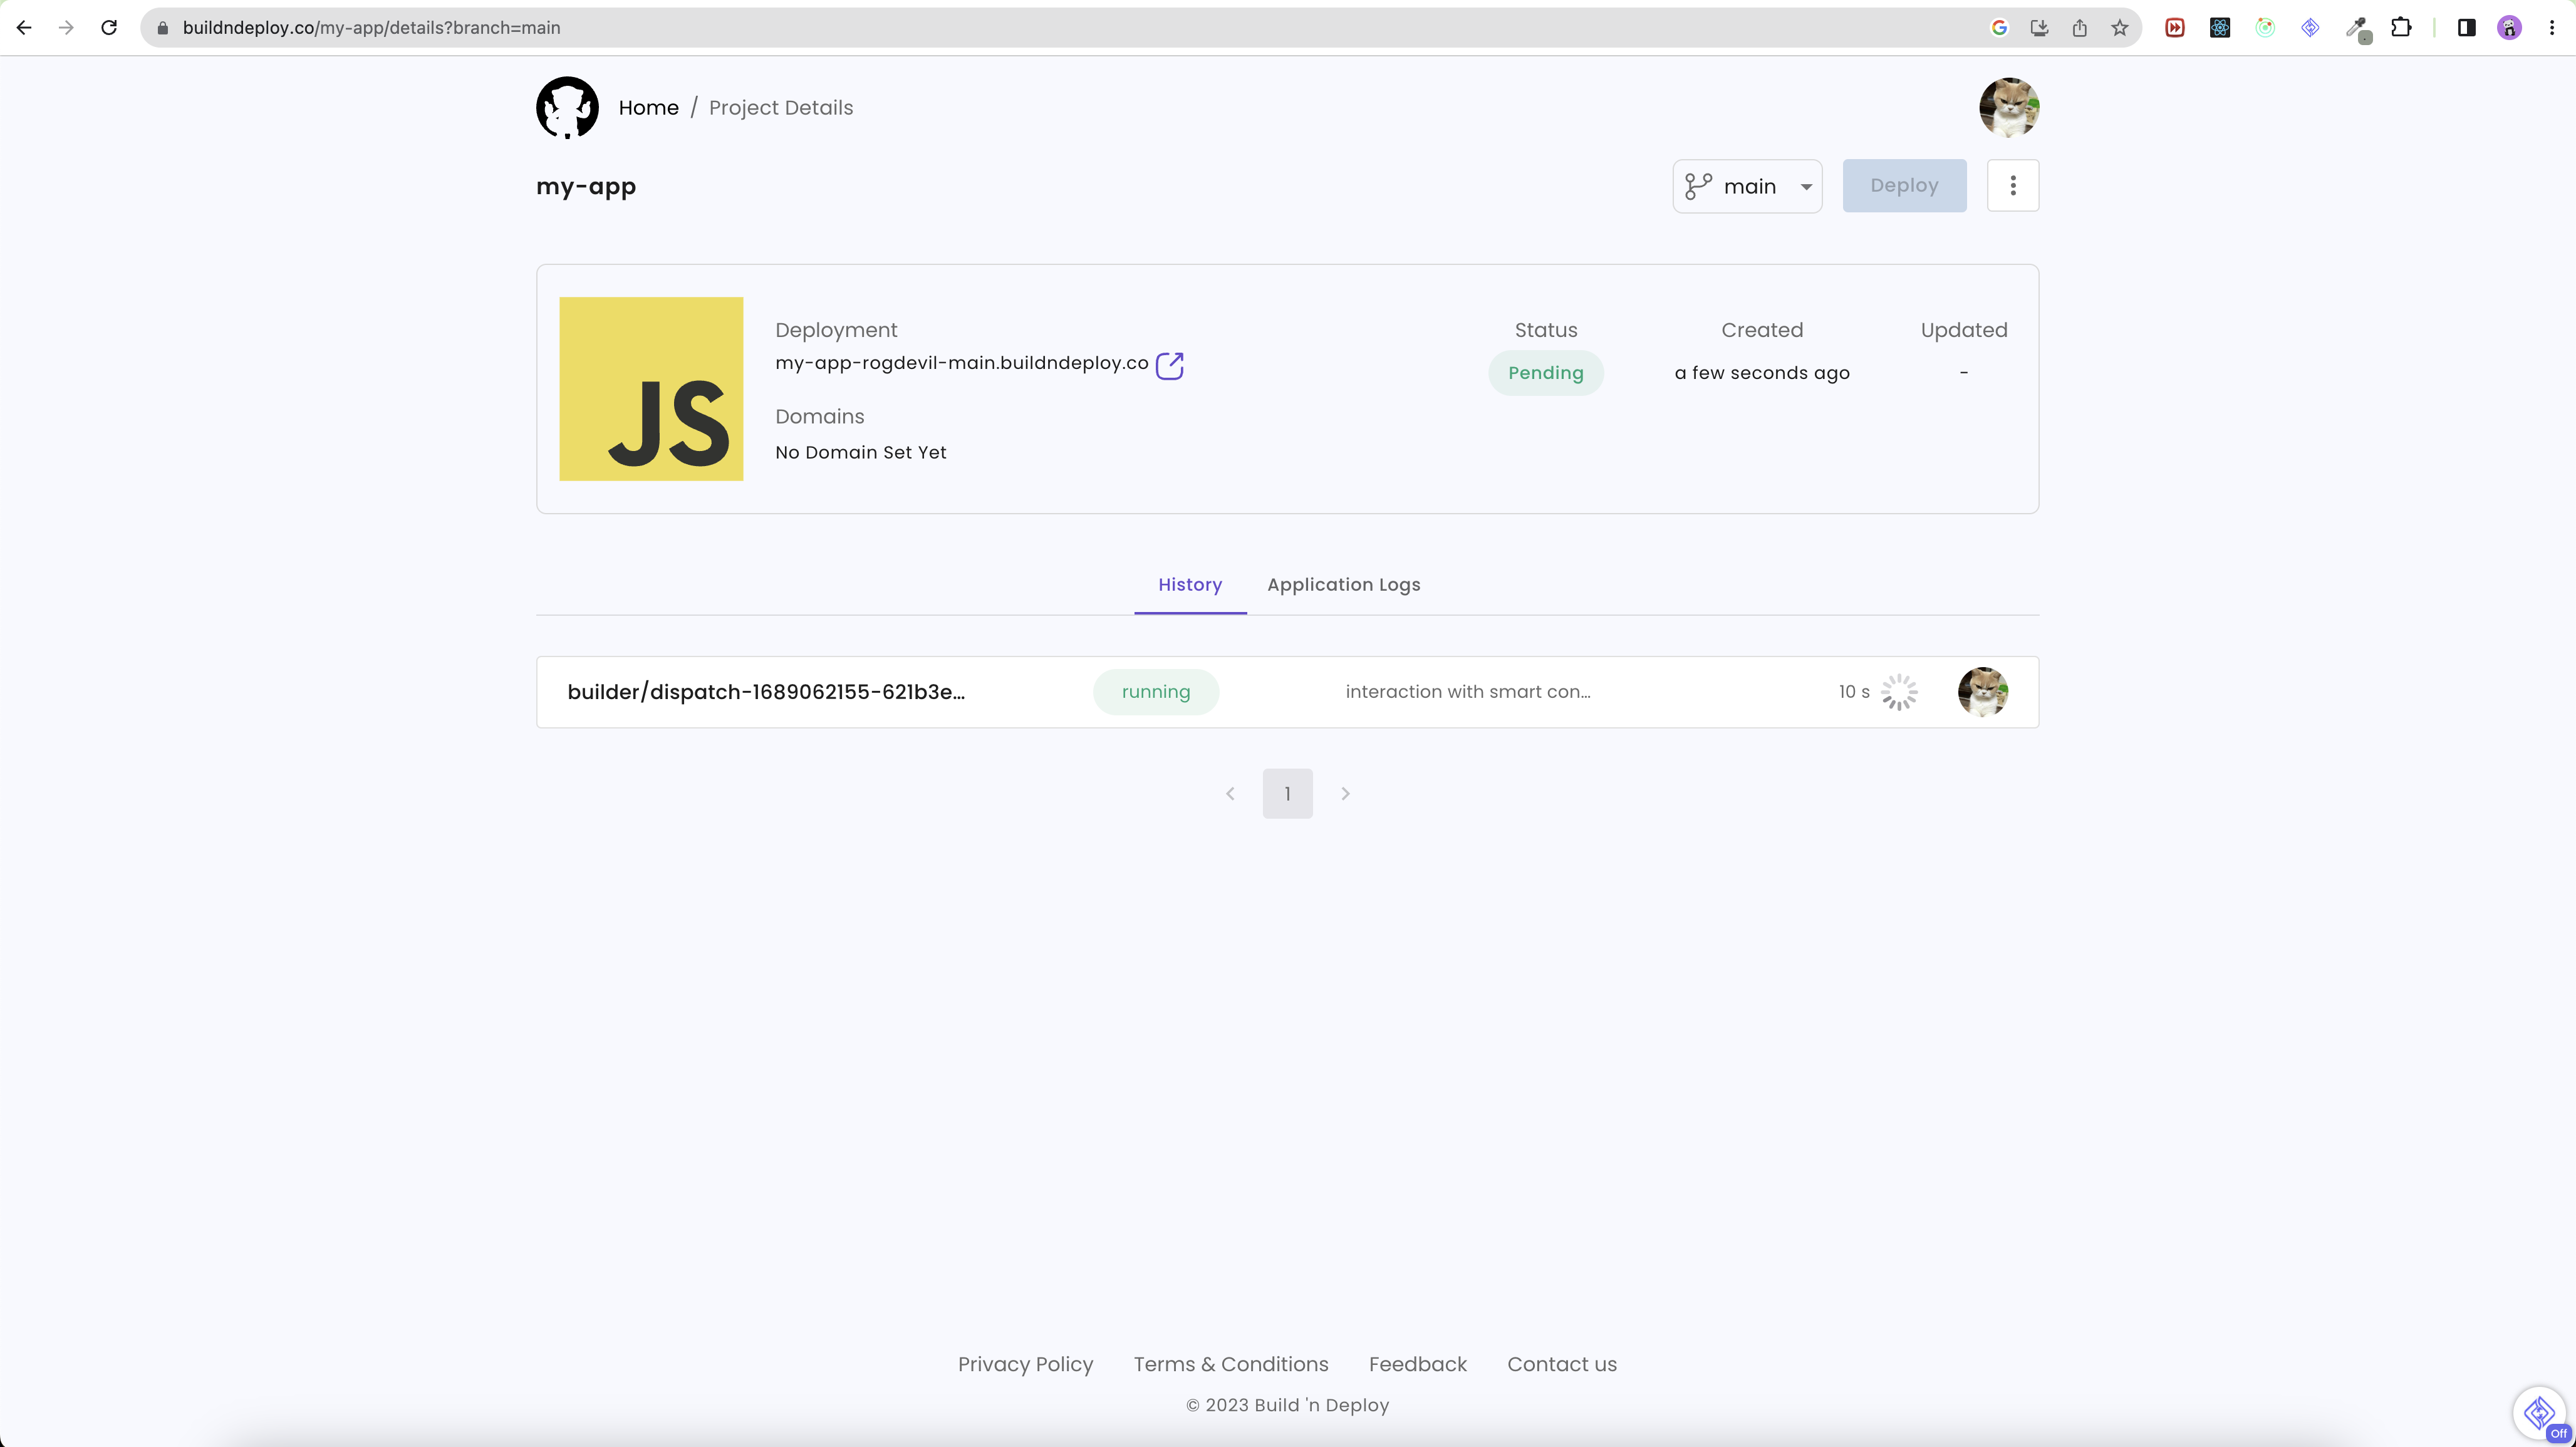
Hit Save button at the top and it will start deployment and you will see a page like this one below:
once the running state changes to complete you can click and visit the marvelous 🥺 app that you just created by clicking the URL under Deployment.
Conclusion
Coding is all about using the right tools that fits your need and this might be exactly what you are looking for to deploy your backend and fronted.
Adios ✌🏻